Monday, 30 December 2013

Cherry Jam and Cherry Picking in Wombat NSW


Blue Sky.  Wide open road.  A car (and stomach) full of cherries.

Earlier this month I went on a road trip to a cherry farm near Young.  Young is a town in the ‘South West Slopes’ region of NSW (according to Google) that’s known for its cherries, so much so that every year they have a cherry festival. My girlfriend’s folks drive there every year to pick their own fresh cherries.  Their favourite farm is 
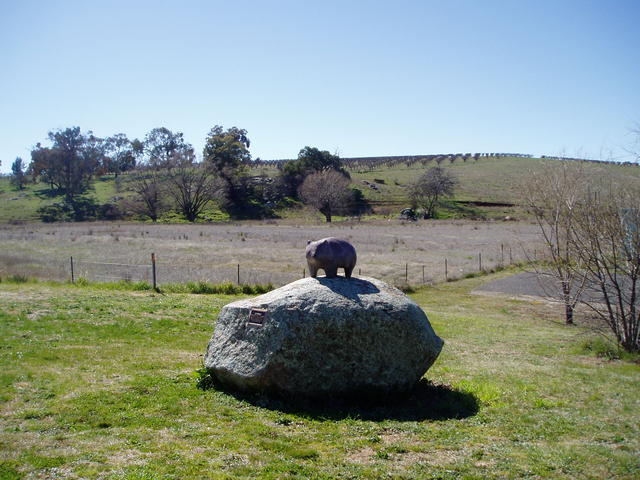
in a town just outside of Young called Wombat (yes, there is a statue of a wombat next to the town’s pub) and goes by the name of Wombat Heights.  So when they mentioned that they would be going again this Summer, I thought it would be a good idea to tag along and bring back a haul for myself.


Wombat Heights is about a 4 hour drive from Sydney.  You pretty much drive towards Canberra, but then keep going past Yass and then turn right, and keep going a bit further. 

Once you get to the farm, the process is pretty simple to get picking – head past the ‘Grog Shed’ and the farmer will give you a large bucket and then send you off in the direction of the chosen cherry orchard.  Wombat Heights grows several varieties of cherries and other fruit in their orchards, so the cherry variety that you pick depends on day you go and what is ripe at that time in the season.  Some of the trees we meandered past had already been stripped bare by professional pickers (read backpackers) for commercial sale. 


The cherries we picked were a variety called ‘Ron’ (imaginative name – I assume some guy called Ron created/discovered them).  They have a dark red colour and an intense cherry flavour, and they were unbelievably and addictively sweet.  Cherries were $7 per kilo, which is about half the price you get at fresh food markets.  However, given we took a day off work, hired a car, paid the petrol, did the picking and had to stay in Canberra with my girlfriend's parents for the night, I’m not sure you could claim that it is an economically effective method of cherry procurement...


In the end we picked around 5 kilos of cherries and brought them back to Sydney.  Other than eating them non-stop, I was keen to make 2 things –  savoury pickled cherries and cherry jam (I'll talk about the pickled cherries in a later post).

The process of making cherry jam is tedious, mainly because you need to remove thousands (OK, hundreds) of pips.  To do this, you need to get hold of a cherry pipper.  This contraption cuts out the pip but keeps the rest of the cherry intact.  It’s a pretty messy process and I managed to cover the kitchen in bright red cherry juice - my girlfriend cleaned the kitchen the following week and discovered the remnants still on the ceiling.


The end product is a really delicious jam with a distinct, rich flavour.  Rather than chopping the cherries up, I kept mine whole, which means you get some good chunks of fruit throughout the jam, but they still soften and absorb the sugar.  The addition of lemon juice balances the sweetness of the cherries and conveniently adds pectin (a thickening agent) to the mixture. 

The recipe below came from my girlfriend’s dad, who makes it every year.  It’s unbelievably easy (once you've removed the pips).  Just add in sugar to two thirds of the total weight of the cherries plus the lemon juice.

Apologies to all the Jarhead readers out there – it’s been ages since I last posted.  I was in the Philippines throughout November, eating my weight in pork (checkout my Instagram to check out some pics of this ridiculous pork consumption).  Then December just flew by! But I’m back now, and I’ve got some great recipes to share in the next few weeks.  


My girlfriend's work were throwing out some vintage Dymo label makers... so we repurposed them.  

Cherry Jam Recipe

What you need:

  • 1 kg of fresh, pipped cherries;
  • 700g of caster sugar;
  • The juice of one lemon
Making the Jam:
  1. Place the cherries in a large pot, add a splash of water and bring to the boil.  Cook for 3 minutes until the cherries have begun to break down.
  2. Add in the sugar bit by bit, stirring it in so it dissolves.
  3. Add in the lemon juice and bring to the boil.
  4. Simmer on a medium to high heat until the mixture reaches a jam-like consistency (you can do the cold saucer test to check this.  See my post about kumquat marmalade for an explanation).  
  5. Place the jam into sterilised jars and seal.  For long term preservation, boil the jars in a water bath for 10 minutes.   


Thursday, 24 October 2013

Kiwifruit Jam


Kiwifruit are a peculiar fruit - furry, brown and unappetising on the outside, but green, sweet and juicy on the inside.  I enjoy eating kiwifruit, but I probably wouldn't go out of my way to get them.

That being said, I was in the supermarket the other day and there was a really cheap deal on for kiwifruit - I could get 8 kiwifruit for $2.  I remembered how I had tried some kiwifruit jam that was made by my girlfriend's father, and how delicious it was.  So I thought I should take advantage of the kiwifruit being in season, and bought 24 of them!  Best $6 I've ever spent!


I would've thought the kiwifruit was from New Zealand.  But while New Zealand are a major producer of kiwifruit, the kiwifruit actually originates from China.  There's a trivia fact for you! They were called Chinese Gooseberries when they made their first appearance in the West, but then the New Zealanders renamed it after their favourite furry bird (due to the similarity in appearance... not the flavour).

They grow on vines rather than trees, which makes cultivation more difficult.  They also contain a special enzyme called 'actinidain' which can be used as a meat tenderiser and breaks down dairy products - so of course Australians (and New Zealanders - but don't get me started on the origin of Pavlova!) often put kiwifruit slices right on top of a layer of cream on a Pavlova - makes complete sense!


All the credit for the recipe below should go to my girlfriend's dad!  There weren't any kiwifruit recipes in the pickling books on my bookshelf - kiwifruit proliferation must be a Southern Hemisphere thing.

This recipe features orange and lemon juice as a source of pectin to help it set, and to also add a bit of tanginess to the flavour - it's a really well balanced jam.  The orange rind also adds complexity to the flavour.  But the star of the jam is of course the kiwifruit - great on toast on a warm summer morning or with cream and scones!

So fellow Jarheads, are you fans of the kiwifruit?  Have you ever tried kiwifruit jam? 


Kiwi Fruit Jam Recipe

(Makes around 4-5 pint jars)

What you need:
  • 20 Kiwifruit (around 1400g of pulp)
  • 1.3kg of sugar
  • 2 lemons, juiced.
  • 2 oranges,
The jam-making:
  1. Firstly, remove all of the green pulp from the kiwifruit.  I did this by cutting the kiwifruit in half and scooping the pulp out with a spoon.
  2. Peel the rind off one orange and then thinly slice it into tiny strips.
  3. Juice the lemons and oranges and set the juice aside.
  4. Add the kiwifruit pulp, sugar, lemon and orange juice, and the orange rind into a pot.
  5. Bring the pot to the boil and simmer for ten minutes.
  6. After ten minutes, use a masher to break down all of the kiwifruit pulp so there's not large chunks.  It can be as smooth or as chunky as you want it to be.
  7. Now, simmer the mixture down with the lid off the pot for around 45 minutes, until it reaches a jam-like consistency.  Use the cold saucer test to test whether it's ready.  Check out my blog on kumquat marmalade for an explanation of the test.  

Wednesday, 9 October 2013

Onion Marmalade


How do you make your house smell like onions for a week?

Make onion marmalade of course!

Last week I travelled up to sunny Yamba for a wedding.  It was great to take some time off to relax, and the weather was beautiful.  We decided to try out a new cafe that had recently opened up in Yamba called Irons and Craig.  The food was delicious and I particularly liked a dish which featured mushrooms with feta on sourdough toast. The dish also had some onion marmalade on the side.  The onion marmalade was sweet and caramalised and went pefectly with the mushrooms.


So all throughout September I have been tied to a pedometer, measuring the steps that I take each day.  I was part of a team for Steptember, a charity raising money for the Cerebral Palsy Alliance.  The goal was to take 10,000 steps a day and raise $500 as a team.  The average office worker only takes 2,500 steps a day, so this goal is more challenging than it sounds.

To raise money we decided to have a cake and preserves sale.  One of my colleagues made some delicious chutneys, and there was plenty of cake to be sold.  I decided to make onion marmalade after tasting the delicious version in Yamba.

Even though it's called 'marmalade', it's more like a jam, given that there's no citrus peel.  You might think that three kilos of onions is a lot, but it actually only makes 5 decent jars.  A lot of the recipes of onion marmalade online call for the onions to be really caramelised, until dark brown, and contain ingredients like red wine or balsamic vinegar to make the colour a deep red.  The one I had at Irons and Craig was more of a light brown colour, and the onions were transluscent, which meant that the preserve wasn't overly sweet or rich.  To replicate this, rather than using red wine and balsamic, I used chardonnay and apple cider vinegar (and a little bit of port).


The Chardonnay I used was the Green Jade Chardonnay from a winery called Gemtree from McLaren Vale.  Interestingly, it's an organic winery.  The Chardonnay was a younger, light, unwooded one, so it imparted a lighter flavour into the marmalade.

I had some thyme lying around after cooking a chicken dish earlier in the week, so I added it into the mix too, along with pepper and nutmeg.


In all my eagerness to sell all of the jars, I didn't actually get to use it myself!  But I received a 'testimonial' from a colleague who said it's really good on a toasted cheese sandwich, or with barbecued meat!

...And my house still smelt like onions, until I made garlic prawns over the weekend... Now it reeks of garlic.


Onion Marmalade Recipe

What you need:
  • 3 kg onions, sliced thinly;
  • 2 1/4 cups of white sugar;
  • 3 cups of white wine (I used Chardonnay);
  • 1 cup of apple cider vinegar;
  • 1/4 cup of port;
  • 1 tablespoon of white pepper;
  • 2 teaspoons of cracked black pepper;
  • a good handful of thyme, leaves picked;
  • 1 tablespoon of sea salt;
  • 1 teaspoon of nutmeg;
  • 1 tablespoon of Keen's mustard powder;
  • Olive oil
Making the marmalade:

  1. Heat a splash of olive oil in the bottom of a large pot and add in the onions.  You might need to do this in parts, adding more raw onions as the ones in the pot sweat down.
  2. Once all of the onions have softened significantly but have not browned or caramalised (will take around 30 mins), add in the white wine, the vinegar and the port and bring to the boil.
  3. Add in the pepper, herbs and spices and simmer for 45-60 mins, or until the liquid has become a syrup and you’re pretty much left with a sticky, jam-like consistency.


Tuesday, 1 October 2013

Revisiting Preserves: Kim Chi and Preserved Lemons

So I was recently faced with two horrible pickling setbacks.

Firstly, I ran out of kimchi.  Despite my girlfriend rejoicing at the lack of fermented cabbage stinking out our fridge, I was devastated.  I had received quite a few requests for samples and this depleted my supplies.

Secondly, I made some bad cocktails (#cocktailFAIL).  I'd come across a cool recipe online for preserved lemon Martinis, which I tested out using the batch I'd made a few months ago.  The only problem was that in my first batch of preserved lemons I'd sealed the top of the jar with some olive oil.  The thing to note here is that oil is not a key ingredient of a Martini - I've never had a beverage that could be described as 'greasy' until that Martini experiment.  So in light of these two setbacks, I decided to reattempt both of these preserves.  

Preserved Lemons


When I made preserved lemons earlier this year, I was pleased with the results, but I had a feeling they could taste better with one key variation to the method.  

A few weeks ago, I had lunch at my folks' place.  It was a beautiful sunny day so we had lunch under the verandah outside.  While gorging myself on my mum's delicious roast pork with the Father's Day Relish I had made that weekend, I noticed that the citrus trees all over the backyard were abundant with fruit.  I picked lots of kumquats, but also got a decent stash of lemons.  

So I decided to remake some preserved lemons, this time improvising with my own recipe.  Previously I followed a recipe on the SBS website, which called for submerging the lemons in boiling water.  While most of the recipes I saw in my research called for immersing the lemons in lemon juice, I didn't have enough lemons to do this, so I went with the alternative boiling water method.  The extra lemon juice obviously enhances the preservation of the lemons, because of the higher level of acid, and also leads to a more intense lemony flavour.   

I haven't yet tried to use my new extra-lemony batch in my cooking but I'll keep you all posted on how they turn out.  I'll also write a post about the preserved lemon Martinis when I get a chance to make them.


Recipe

What you need:

  • 10 lemons;
  • Maldon Sea Salt;
  • 500ml jar;
  • 3 birdseye chillies, sliced in half;
  • A few sprigs of rosemary.
The preserving:
  1. Cut each lemon from one pointy end of the lemon, to about 3cms from the other pointy end, so that the two sides of the lemon still hold together.  Then cut it in the same way so they are essentially in quarters that are still held together at one end. Do this for 6 lemons, leaving the other 4 aside.  
  2. Stuff one heaped tablespoon of sea salt into each lemon.
  3. Cram all of the lemons into the jar.  Stuff in the chillies and the rosemary in as you go so there's an even distribution.  
  4. Sprinkle in a bit of salt over the top of the jar for good measure.  Juice the remaining four lemons, and pour the juice into the jar so all the salted lemons are completely submerged.
  5. Leave in a cold dark place for one month before using them. 

Kimchi


This Korean preserve is meant to be pretty funky and not in the Saturday Night Fever sense of the word  - fermented cabbage has a really pungent smell.  For my first attempt at kimchi I used a recipe by David Chang from an issue of the Lucky Peach magazine.  He recommended leaving the kimchi for a week before using it, and added in a lot of fish sauce and Korean salted brine shrimp, all leading to maximum funkiness.  While this might not be some people's cup of tea, I thought the pungent and intense taste was still pretty delicious.  I had also made a fair bit of kimchi in this first batch and set aside a huge jar for myself, so I didn't quite get to go through it before it started getting mouldy.  

This time, I turned to another Asian American chef, Edward Lee, and a recipe in his excellent book Smoke and Pickles.  A key difference between Chang and Lee's recipe is that Lee adds daikon into the mix.  I'd been using daikon radish quite a lot in my preserves over winter, so it was easy for me to add this into the kimchi too.

Lee soaks the cabbage for only 2 hours in a salt brine, while Chang soaks his overnight (that being said, Chang's brine uses much less salt than Lee's). Whether or not this actually makes the cabbage less salty or draws out less water than if the cabbage was left overnight is questionable.

Another key difference between the Kim Chi recipes is that Lee makes a paste using water, rice flour and sugar to make the sauce thicker (see picture below).  He approaches his Kim Chi recipes in a three phase process - the Cabbage, the Paste and the Guts.  Finally, Lee pairs back on some of the fishy ingredients, making it slightly less intense.  


After trying both, I think I prefer Lee's recipe.  It's a bit more balanced and a better accompaniment to food than Chang's, which can overpower the flavour of the food  you're having it with (but it's still pretty good on its own).  

I adapted Lee's Kim Chi recipe so it would be easier to make in my tiny kitchen. I blitzed some of the ingredients together in a food processor instead of pre-grating or crushing them.  I also decided to use savoy cabbage instead of chinese cabbage as an experiment - seemed to me that the thicker savoy cabbage might hold the crunch better than chinese cabbage, and after tasting the end result, I think I was right.    I also included a heaped tablespoon of brine shrimp, which isn't called for in Lee's recipe, but which added some depth of flavour and an enhanced umami taste.

Note:  Beware of exploding kimchi jars.  I left mine out on my kitchen bench overnight and in the morning I returned to this carnage - kimchi juice everywhere!  


Recipe

What you need:
  • 1 head of savoy cabbage;
  • 1 cup of rock salt;
  • 3/4 cup of rice flour;
  • 1/4 cup of sugar
  • 2 onions, sliced thinly;
  • 2 1/2 cups of Kochukaru (korean chilli flakes);
  • 250g of daikon radish cut into pieces;
  • A thumb sized piece of ginger, cut into small pieces;
  • 6 cloves of garlic;
  • 1/3 cup of fish sauce;
  • 2 handfuls of chopped spring onions.
The preserving:
  1. Slice up the cabbage into bite sized pieces that will fit into your jars nicely.  
  2. Dissolve the cup of salt into around 500ml of water (enough to submerge your cabbage in a large bowl, just add extra if needed).  Then add the cabbage into the bowl and make sure it's covered by the brine.  Soak for two hours.
  3. Drain the cabbage and rinse off any excess salt, then set aside.
  4. Next, make the paste.  Add the water, rice flour and sugar into a pot and bring it to a simmer until the mixture thickens to a paste.  Allow this to cool.
  5. Set up a blender or food processor.  Add in the chilli flakes, onions, daikon, garlic, ginger, fish sauce and brine shrimp into the processor and blitz until it's completely mixed in a thick paste. 
  6. Pour the red processed paste into the white rice flour paste (which has cooled), and mix until combined.  Add in the chopped spring onions and stir to combine.
  7. Finally, mix all of this with the cabbage.  Add into sterilised, air-tight containers.  Leave these out  on a bench for a day (no longer than a day and a half) and then refrigerate.  
  8. The Kim Chi will be ready to eat in another three days.  


Tuesday, 3 September 2013

The Father's Day Relish Experiment


So 20 posts into this blog, and after making several different types of pickles, a jam, a sauce and a few marmalades, I was ready for something different - a relish.

I can remember a few years back when I was travelling around Canada, I was in Vancouver in the middle of winter.  After a bit of sight-seeing and walking around, I was pretty hungry.   I came across a guy who had set up a barbeque on a street corner and was grilling some kranskys for hot dogs.  You could pair your kransky with a range of  pickles and relishes, displayed in a line of jars.  After a several hours of deliberation, I decided to go with the cucumber relish. The relish really complimented the hot dog and even all these years later, I wanted to recreate the delicious relish to have on sandwiches, hot dogs and to serve with meat.


A relish is pretty much a condiment featuring finely chopped vegetables, preserved in vinegar and sugar, flavoured with herbs and spices.  I used Kevin West's Saving the Season as a reference book to inspire my recipe, and he says that "relish occupies a niche somewhere between condiment and side dish" - so it's quite versatile.

I also wanted to make something from scratch, and invent my own recipe, rather than adapting recipes as I've done previously. Reading through West's relish recipes (try saying that 3 times, quickly!) and some others on the internet, I could see the type of low acid vegetables that are required in relishes, and could see which vegetables are used often and clearly work well, like onions, zucchini and cucumber.


I calculated the dilution level for the vinegar, and decided to include sugar to taste.  I added more sugar than in West's recipes, but he says in his book that he prefers his relishes to be less sweet (and I have a bit of a sweet tooth).

The first step in the recipe is to salt the vegetables.  I ground up some rock salt in a spice grinder and then coated the vegetables.  When I left my last job, my team bought me a spice grinder as a farewell present - it really saves compared with a pestle and mortar.  Tasting the end result I thought I might have over-seasoned the relish, but after trying it with some food, I think it balances out nicely.

The relish is perfect with meat, like a simple roast pork.  The fennel in particular adds a really nice aniseed flavour to cut through fatty meat. Over the weekend, I had my family's Father's Day lunch.  As with all family functions, my mum had completely over-catered and conveniently cooked some roast pork for me!  My cousin Bettina who took some photos for my recipes on Yahoo! 7 Food (caramel apple jam and zucchini pickles) was kind enough to take some shots of the relish for me.


You'll also see in the recipe below that I had planned to include leeks into the relish.  But after being swept up in a busy weekend, I totally forgot to add them into this first batch!  That being said the relish still tasted fantastic.

Update:  The good folks at  Yahoo! 7 Food just published this relish concoction! Check it out!

Father's Day Relish

What you need:

  • 1kg of zucchini 
  • 6 sweet bullhorn peppers, different colours
  • 1 large bulb of fennel
  • 1 brown onion
  • 3 spring onions with bulbs (found these at Harris Farm)
  • 2 leeks
  • 5 cloves of garlic
  • 6 long red chillis
  • 1 litre of apple cider vinegar
  • 430 ml of water
  • 2 cups of sugar 
  • 3 tablespoons of coriander seeds
  • 3 tablespoons of fennell seeds
  • 1 tablespoon of mustard powder
  • 1 tablespoon of mixed herbs


Making the relish:

  1. Finely dice all of the vegetables into tiny squares - the dice is important in ensuring the relish is of a "spoonable" consistency.
  2. Now coat the diced vegetables in the sea salt and leave aside at least for two hours. This will drain out excess water from the veg and assist in preservation.  I had to leave mine overnight because I couldn't finish it in one day.  
  3. Then pour the vegetables into a colander to allow the excess water to drain out.  Thoroughly  rinse off the salt, and pour a kettle of boiling water over the vegetables, and let the vegetables drip dry for about five minutes.
  4. In the meantime, toast your fennell and coriander seeds in a dry pan until they become fragrant - be careful not to burn them.  Then grind these up in a pestle and mortar or spice grinder.  
  5. Pour in the vinegar and water into a pot, and add in the sugar.  Heat the brine until it the sugar dissolves, then add in your vegetables and the toasted spices, mustard powder and herbs. 
  6. Cook the mixture for 20-25 minutes on a low simmer, until the vegetables are a bit translucent.  
  7. Sterilise your jars.  I used some wide mouth pint sized Ball jars.  Use a slotted spoon to pack the vegetables into the jar - this just ensures that the jars aren't just full of brine but filled with lots of the relish.
  8. Then top off each jar with the brine, leaving half an inch of room from the brim of the jar (or sufficient space as specified by the jar maker) if you're canning them. 
  9. If you're canning the relish, heat the jars in a water bath for 10 minutes, and then remove.  Double check that the lids have been properly sealed, and if not, then repeat the canning process.